Showing posts with label CSA. Show all posts

Thursday, October 6, 2016

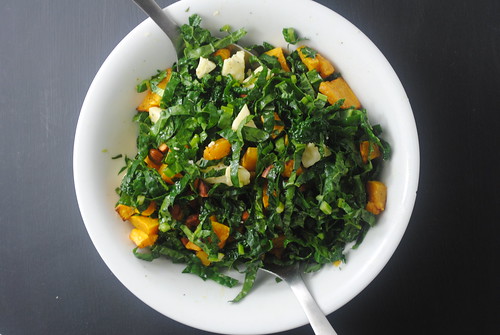
Kale and butternut squash salad

DSC_0011

Once upon a time, I knew nothing about kale. I was curious so I tried making the highly acclaimed kale chips. Not a fan. So I didn't buy kale again. Then I tried it in a soup. Hmmm, better. Then I joined the CSA and I had no choice but to embrace kale with open arms. I now know the difference between the types of kale. I personally like Lacinato better than the curly kind (can you say kale nerd?). I've also found several ways to prepare it. Creamed kale evoked cheers from my 6 year-old - same girl that won't eat granola and cries when I serve broccoli. But ok, she cheers for kale. Stranger things have happened.

This salad is fabulous for fall and uses not only kale but also winter squash which is making several appearances in my weekly CSA haul. I chuck the squash in the oven in the morning and then toss everything together in time for lunch. It lasts a couple of days so could be made ahead for an easy peasy lunch.

Kale and butternut squash salad
Adapted from Food52 Genius Recipes by Kristen Miglore

Ingredients
  • 2 cups cubed butternut, kabocha or other winter squash
  • Extra virgin olive oil
  • Salt and freshly ground black pepper
  • 1 bunch kale (preferably lacinato or dinosaur kale), ribs removed and finely sliced, about 4 cups
  • 1/2 cup almonds, cut roughly in half
  • 1/2 cup crumbled or finely chopped Cabot cloth-bound cheddar (or any good, aged cheddar)
  • Fresh lemon juice
  • Pecorino or other hard cheese, for shaving (optional)
Cooking Directions
  1. Heat oven to 425° F. Toss squash cubes in just enough olive oil to coat, and season with salt and pepper. Spread on a baking sheet (lined with parchment for easier cleanup), leaving space between the cubes. Roast in the oven until tender and caramelized, about 30 minutes, tossing with a spatula every 10-15 minutes.
  2. Toast the almonds on a baking sheet in the same oven until they start to smell nutty, tossing once, about 10 minutes. Let cool.
  3. In a large mixing bowl, toss the kale with the almonds, cheddar and squash. Season to taste with lemon juice and olive oil (approximately 1 tablespoon lemon juice and 2 tablespoons olive oil).
  4. Season to taste with salt and pepper.
  5. Divide salad between two plates or shallow bowls. Garnish with shaved pecorino cheese, if desired, and serve.

Tuesday, September 27, 2016

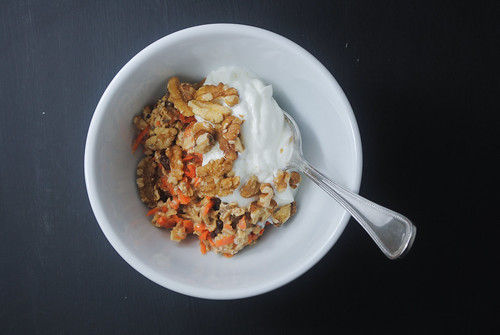
Carrot cake overnight oats

DSC_0023

To say I was skeptical about overnight oats would be an understatement. The thought that anything good could come out of mixing uncooked oats with liquid and sticking it in fridge over night seemed an impossibility. But I kept seeing recipes for them and friends (who actually have good taste) made them and liked them. Hmmm. Maybe...

Then one week my CSA came with carrots and a recipe for carrot cake overnight oats. Did they say carrot cake? I still didn't try them right away. But a few weeks later, I gave it a shot. First, it's not so much a recipe as an assembly of ingredients. There's no cooking. Just stir. So it's fabulous to make with the kids. Second, it's yummy. The cinnamon and allspice actually make it taste like carrot cake. I eat it with a scoop of plain Greek yogurt (vanilla would be good too) and a few walnuts or pecans.

Carrot Cake Overnight Oats
Adapted from a recipe by Lee Hersh

Ingredients
Dry
1 cup rolled oats
½ cup carrot, finely grated
1 teaspoon cinnamon
¼ teaspoon allspice
1 tablespoon chia seeds
3 tablespoon raisins
Wet
1 teaspoon vanilla extract
3 tablespoon maple syrup
1 and ¼ cup almond milk, unsweetened
Instructions

1. First, mix all dry ingredients in a large bowl.
2. Add in wet ingredients and mix again.
3. Place in the refrigerator, covered, for at least 2 hours or overnight. Serve cold.
4. Top with Greek yogurt and pecans.

Monday, July 18, 2016

Lobster, pea, and pea leaf salad

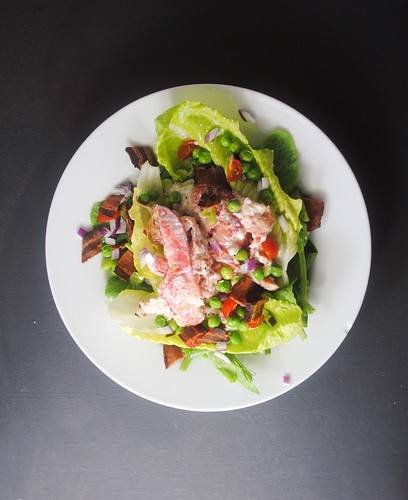
DSC_0013

It's hot. Stinky-sweaty kid hot, thank God I run at 5:30 a.m. hot. Maybe not Texas in summer hot, but I'm a bona fide Jersey girl who has had enough of this humidity. And who wants to cook when it's like this (OK, me), let alone eat a big heavy meal.

And so for the first time in all our years of marriage and dating, I served my better half a salad for dinner. I kept it a secret til just before serving (fear of mutiny perhaps). And guess what? He loved it. Even went so far as to say it's better than my lobster BLTs. Whaaaa????

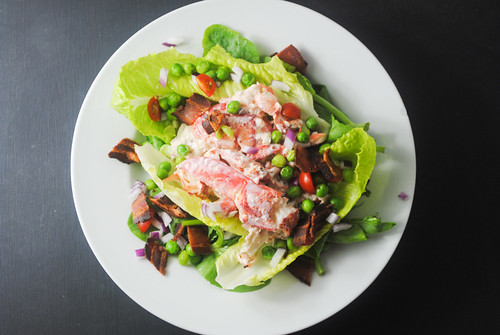
My inspiration? My CSA of course. They gave me fresh peas and beautiful lettuce. So I wanted a dish that highlighted the peas. The lobster is lightly dressed and piled on top of a bed of pea leaves and Romaine. Add red onion, bacon, peas and tomatoes and dinner is done. I find pea leaves at my Asian market. But you could swap another tender green lettuce. And if you cannot get fresh peas, just thaw some frozen ones. Easy-peasy.


DSC_0004

Lobster, pea, and pea leaf salad

This light lobster and pea salad is perfect for a light supper on a hot summer night.

Ingredients
    Dressing
  • 2 Tbsp. mayonnaise
  • 2 Tbsp. sour cream
  • 1 tsp. lemon juice
  • 1/2 tbp. coarse Dijon mustard

  • Dressing
  • Meat from 2 cooked lobsters, each about 1 1/4 pounds
  • 1 cup peas, fresh or frozen
  • 4 strips bacon, cooked and crumbled
  • 1/4 cup grape of cherry tomatoes, halved
  • 2 Tbsp. chopped red onion
  • 2 cups pea leaves
  • 6 medium Romaine leaves
  • Freshly squeezed lemon juice
  • Extra-virgin olive oil

Cooking Directions
  1. Whisk the dressing ingresients in a small bowl and set aside.
  2. If using fresh peas, blanch them in boiling salted water until tender, about 5 minutes.
  3. Toss the pea leaves and Romaine with a little lemon juice and olive oil. Add salt and pepper to taste. Arrange on 2 plates.
  4. Toss the lobster meat with a little of the dressing to coat. Add more as needed, but don't overdress!
  5. Pile the lobster in the center of the plate then sprinkle the peas, bacon, onion and tomatoes over the top.

Wednesday, July 6, 2016

Peach and blueberry crostata

DSC_0040

What ever happened to the lazy days of summer? This summer feels like it is flying. Fourth of July weekend has come and gone, and it was a good one. On Friday, we surprised our girls with a trip to Sesame Place. My 3-year old's reaction to the news was thanks enough. Saturday found us in NYC, strolling across the Brooklyn Bridge (if one can actually stroll with a 3- and 5-year old in tow...). Sunday, we hung out at home and had friends over for lobsters. Perhaps the most memorable part was two of my mommy friends racing each other through the grass behind my house - their speed was pretty impressive I must say. As the race ended, one tackled the other. I simply love when adults act like kids...

...And so the summer continues.

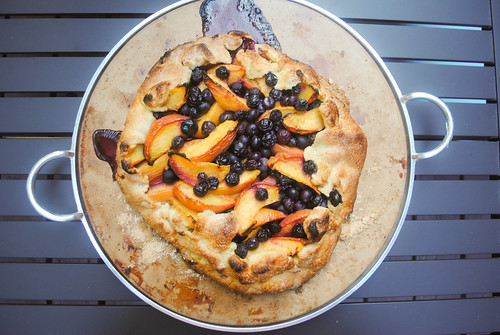
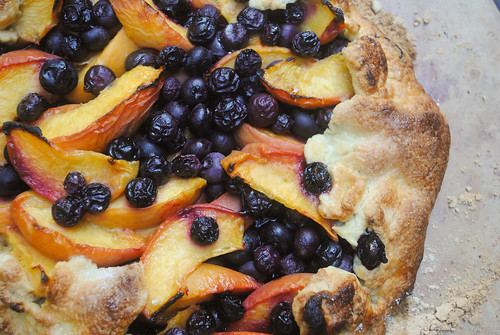
This rustic peach and blueberry crostata is easy enough to make and uses some of summer's best fruit. There's lemon zest in the dough which makes the flavor even brighter. We actually ate it for breakfast a few days with a dollop of Greek yogurt. It's also amazing with vanilla ice cream. (Blueberries courtesy of my Dreyer Farms CSA share of course...)

DSC_0036


Peach and blueberry crostata
Adapted from Eat This Book by Tyler Florence

Make sure to use enough flour so this slides onto the pizza stone or opt for the other method to save the trouble...

Yield: 1 10-inch crostata, 8 servings


Ingredients
    Pastry
  • 2 cups all purpose flour, plus more for dusting
  • 3 Tbsp. sugar
  • 1/4 tsp. salt
  • Zest of one lemon, grated with a microplane
  • 3/4 cup (1 1/2 sticks) unsalted butter, cut into chunks and cold
  • 1 large egg yolk
  • 2 Tbsp. ice water, plus more if needed

  • Filling
  • 5 medium ripe peaches, pitted and sliced
  • 1 pint fresh blueberries
  • Juice of half a lemon
  • 2 Tbsp. sugar
  • 2 tsp. flour

  • Glaze
  • 1 large egg, beaten with 1 Tbsp. of water
  • 2 Tbsp. sugar
  • Vanilla ice cream, to serve (optional)

  • DSC_0052
Cooking Directions
  1. To make the pastry: combine the flour, sugar, salt, and lemon zest in a large mixing bowl. Add the butter and mix with a pastry blender or your hands until the mixture resembles coarse crumbs. Add the egg yolk and pour in the ice water; work it in to bind the dough until it holds together without being too wet or sticky. Squeeze a small amount together, if it is crumbly, add more ice water, 1 teaspoon at a time. Form the dough into a disk and wrap in plastic wrap; refrigerate for at least 30 minutes.
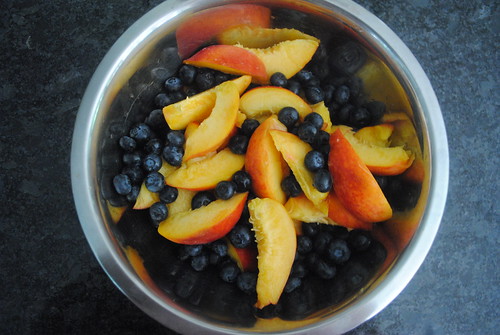
  2. To make the filling: combine the peaches, blueberries, lemon juice, sugar, and flour in a large mixing bowl. Toss the mixture gently to coat the fruit.
  3. Place a pizza stone in a conventional oven and preheat to 375 degrees F. Place a rimmed baking sheet on the shelf under the pizza stone to catch any drips. If you don't have a pizza stone, simply assemble the crostata on a rimmed baking sheet and bake it on that.
  4. Sprinkle the counter and a rolling pin lightly with flour. Roll the dough out into a 14-inch circle, about 1/4-inch thick. Transfer the dough to a well-floured pizza paddle. (Or your baking sheet.) Spoon the fruit mixture into the center of the dough, leaving a 2-inch border all around; brush the border with the egg wash. Lift the edge of crust over the filling, leaving the fruit exposed in center. Gently fold and pinch the dough to seal any cracks. Brush the crust with the remaining egg wash and sprinkle with sugar. Bake the crostata on the preheated pizza stone for 30 to 40 minutes or until the crust is golden brown and fruit is bubbly and tender. You can use a pizza paddle to remove it or just leave it on the stone as I did. Serve warm or at room temperature with vanilla ice cream. Also amazing for breakfast with a dollop of Greek yogurt.

Thursday, June 16, 2016

Zucchini noodles with basil and Parmesan

045

I swear my life has a soundtrack. Songs that play in my head at random moments. Tonight I hear, "cause sometimes you're shown the light in the strangest of places, if you look at it right." The Dead.

I can't actually recall the name of the song. And I for sure know it has nothing to do with, well, zucchini.

Yes, I said zucchini.

To me the lyric is about taking a different approach, looking at things a different way to get a new result. Like the scene from Dead Poets where Robin Williams has the students stand on their desks to get a different perspective.

Translate that to the world of a 3-year old and 5-year old and it means making the zucchini look like something different so that they will try it. And guess what? It worked! More than worked. It was a hit. "I love the noodles.", "These noodles are delicious". And CLEAN plates!!!!

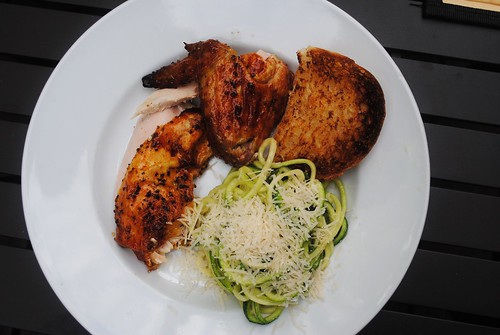
What's the secret? I spiralized. I've rolled my eyes at the thought in the past. But needing creative ways to use my CSA haul, I've ventured to uncharted territory. I got the Kitchenaid attachment and spiralized 3 zucchini. Add a little butter, garlic, parm and fresh basil, and VOILA! A miracle.

Now, one question. How in the heck do I spiralize broccoli??????

PS I served it with a Griggstown chicken that I grilled on a rotisserie and an arugula and beet salad with local goat cheese (all CSA fare). Thank you Dreyer Farms!

Zucchini noodles with basil and Parmesan

When you need a little hope that your kids will one day love their veggies.

Ingredients
  • 3 medium zucchini, spiralized (you can buy them already cut at Whole Foods)
  • 2 Tbsp. butter
  • 2 cloves garlic, minced
  • 1/2 cup Parmigiano-Reggiano, grated, plus more for garnish
  • 8 leaves fresh basil, thinly sliced
  • Kosher salt, to taste

Cooking Directions
  1. Melt the butter in a large saute pan over medium heat. Add the garlic and saute for about 1 minute. Don't let the butter or garlic brown.
  2. Add the zucchini and spinkle with a bit of salt. Saute, stirring frequently, for about 2 minutes. Add the cheese and toss for another minute.
  3. Remove from heat and toss in the basil. Adjust seasoning if needed.
  4. Garnish with additional cheese to serve.

Monday, May 30, 2016

Spinach and bacon quiche

Week 2 of my CSA: Holy greens, Batman! This week's share is one ginormous box of greens: spinach, kale, Boston lettuce, parsley, cilantro, Swiss chard, collard greens, escarole... Challenge accepted!
054
Here's how I'm using these goodies:
  • Spinach: spinach and bacon quiche featured here
  • Escarole: salads for my lunch and also salad to top chicken cutlets Milanese
  • Collards: Braised with barbecue chicken
  • Kale: Portuguese Caldo Verde (chorizo, potato and kale soup)
  • Boston lettuce: Lettuce wraps with Vietnamese marinated pork tenderloin
  • Herbs: Thinking about a chimichurri with some grilled steak
  • Swiss chard: TBD (any ideas, people???)
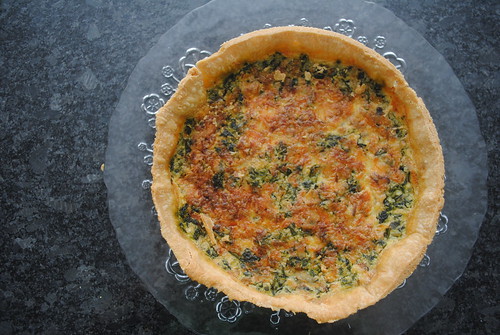
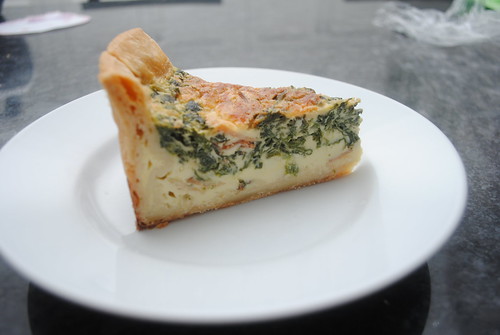
This quiche is a bit harder than my typical recipe, but it's worth the effort. The dough needs to rest a bit before rolling and he recommends frothing the dairy/egg mixture. I didn't take out the blender but rather used my Kitchenaid with the whisk attachment.

Can't wait to see what next week brings now that the weather had finally turned sunny and warm. Let me know if you have ideas for the Swiss chard. Or the other greens - I'm sure there will be more to come!!


Spinach and bacon quiche
Adapted from Bouchon by Thomas Keller

058

Basic Quiche Shell Makes 1 nine-inch tart shell - Keller says to use a 9x2 inch ring mold. I don't have one so I used my springform pan and it worked fine.

Yield: 8 servings

Ingredients:
  • 2 cups flour (about 12 ounces), sifted, plus a little more for rolling

  • 1 teaspoon kosher salt

  • 8 ounces (2 sticks) chilled unsalted butter, cut into 1/4-inch pieces

  • 1/4 cup ice water 
  • 
2 tablespoons canola oil
Method:
  1. Place 1 cup of the flour and the salt in the bowl of a heavy-duty mixer fitted with the paddle attachment. Turn the mixer to low speed and add the butter a small handful at a time.
  2. When all the butter has been added, increase the speed to medium and mix until the butter is COMPLETELY blended with the flour. Reduce the speed, add the remaining flour and mix just to combine.  (Remember you don't want to see ANY flecks of butter in the dough, as they will melt when the shell is cooked and leave holes in the shell causing potential leaks when you fill it with custard.)
  3. Add the water a little at a time and mix until the dough gathers around the paddle and pulls cleanly away from the sides of the bowl. It should feel smooth, not sticky.  You may not need all the water, or you may need a little more.
  4. Remove the dough from the mixer and check to be certain that there are NO visible pieces of butter remaining; if necessary, return the dough to the mixer and mix briefly again. Pat the dough into a 7- to 8-inch disk and wrap in plastic. Refrigerate for at least 1 hour or up to a day. (If the dough does not rest, it will shrink as it bakes.)
  5. Lightly brush the inside of a 9-by-2-inch bottomless cake ring with canola oil and place it on a parchment lined jelly roll pan. Place the dough on a floured work surface and rub on all sides with flour. Flatten it into a larger circle using a rolling pin or the heel of your hand. Roll the rolling pin back and forth across the dough a few times, then turn it 90 degrees and roll again. Continue to turn and roll until the dough is one-fourth inch thick (yes, this is a fairly thick crust) and about 14 inches in diameter. (If the kitchen is hot and the dough has become very soft, move it to a baking sheet and refrigerate for a few minutes.)
  6. To lift the dough into the tart pan, place the rolling pin across the dough about one-quarter of the way up from the bottom edge, fold the bottom edge of the dough up and over the pin, and roll the dough up on the rolling pin. Lift the dough on the pin and hold it over the pan, centering it. Carefully lower the dough into the pan, pressing it gently against the sides and into the bottom. Trim any dough that extends more than an inch over the sides of the pan and reserve the scraps. Fold the excess dough over against the outside of the ring. (Preparing the quiche shell this way will prevent it from shrinking down the sides as it bakes. The excess dough will be removed after the quiche is baked.) Carefully check for any cracks or holes in the dough, and patch with the reserved dough as necessary. Place in the refrigerator or freezer for at least 20 minutes to re-solidify the butter. Reserve the remaining dough scraps.
  7. Place a rack in the middle of the oven and heat the oven to 375°F. Line the quiche shell with a 15-inch round of parchment paper. Fill the shell with pie weights or dried beans, gently guiding the weights into the corners of the shell and filling the shell completely. Bake the shell until the edges of the dough are lightly browned but the bottom is still light in color, 35 to 45 minutes.
  8. Carefully remove the parchment and weights. Check the dough for any new cracks or holes and patch with thin pieces of the reserved dough if necessary. Return the shell to the oven until the bottom is a rich golden brown, 15 to 20 minutes. Remove from the oven and allow the shell to cool completely on the jellyroll pan. Once again, check the dough for any cracks or holes, and patch if necessary before filling with the quiche batter.

Filling 

Ingredients:
  • 2 tablespoons unsalted butter
  • 1/4 cup minced shallots
  • 1 pound spinach, large stems removed, thoroughly washed
  • 2 teaspoons kosher salt
  • 1 teaspoon freshly ground black pepper
  • 3/4 cup grated comte, emmentaler, or gruyere cheese
  • 6 slices bacon, cooked and coarsely chopped
Method:Melt the butter in a large skillet over medium heat, add the shallots and cook for 2 minutes, add the spinach, salt and pepper and cook for two minutes more, until the spinach has wilted.  Remove spinach from pan and drain on paper towels, reserve until ready to build and bake your quiche.


Basic Quiche CustardMakes enough for 1 nine-inch quiche that serves 8 -10
Ingredients:

  • 2 cups whole milk

  • 2 cups heavy cream

  • 6 large eggs
  • 
1 tablespoon kosher salt

  • 1/4 teaspoon freshly ground white pepper

  • 6 gratings fresh nutmeg
Method:
  1. Combine the milk and cream in a large saucepan and heat over medium heat until scalded (meaning a skin begins to form on the surface). Remove from heat and set aside to cool slightly, 10 to 15 minutes.
  2. Put 3 eggs, half the milk and cream mixture, 1 1/2 teaspoons salt, 1/8 teaspoon pepper and 3 gratings of nutmeg in a blender and blend on low speed about 5 seconds to mix thoroughly, then increase the speed to high and blend until the batter is light and foamy, about 30 seconds.
  3. This is the first layer of custard for the quiche. Once you have assembled the first layer of the quiche, add the remaining custard ingredients to the blender and repeat the process to complete the quiche.


Assembly and Baking:

  1. Scatter 1/4 cup of cheese, 1/2 of the bacon,  and 1/2 of the spinach mixture evenly into baked quiche shell still on baking sheet.
  2. Blend the quiche batter again to aerate it, then pour in enough of the batter to cover the ingredients and fill the quiche shell approximately halfway.
  3. Top the custard with the remaining bacon, filling and another 1/4 cup of cheese.
  4. Blend the second half of the custard and fill the quiche shell all the way to the top, sprinkle with remaining 1/4 cup of cheese (if you don't have a very steady hand, you might spill some of the custard on the way to the oven; fill the shell most of the way, then pour the final amount of custard on top once the quiche is on the oven rack). You may have some custard left over.
  5. Bake for 1 1/2 to 1 3/4 hours, until the top of the quiche is browned and the custard is set when the pan is jiggled. Remove the quiche from the oven and let cool completely on a rack, then wrap and refrigerate until chilled, at least 1 day, or up to 3 days.
  6. Once the quiche is thoroughly chilled, using a sharp knife, cut away the excess crust from the top edge.  Gently remove the outside ring, working it free in spots with a small knife if necessary. Return to the refrigerator until ready to serve.
  7. To serve, heat the oven to 375°F. Line a baking sheet with lightly oiled parchment paper. Using a long serrated knife, and supporting the sides of the crust with your opposite hand, carefully cut through the edge of the crust in a sawing motion. Switch to a long slicing knife and cut through the custard and bottom crust. Repeat, cutting the quiche into 8 to 10 pieces. Place the pieces on the baking sheet and reheat for 15 minutes or until hot throughout. 

Serves 8-10


Related Posts Plugin for WordPress, Blogger...