Monday, June 6, 2016

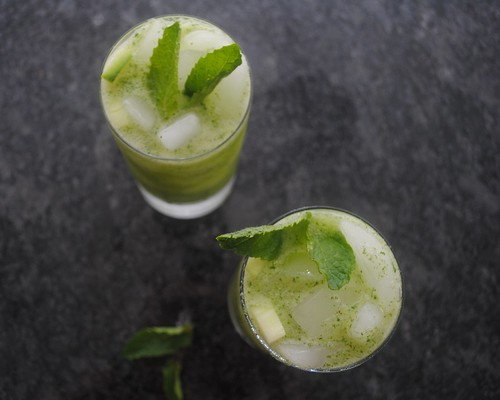
Mint cucumber gin fizz

020

When I look at a cocktail menu, there are a few ingredients that always draw my attention: herbs (mint, thyme, rosemary), cucumbers, summer fruits like berries or peaches. And I tend to go for gin or vodka. My go-to cocktail is a G&T with lime, but last weekend, I felt like trying something a bit more interesting (and I had a boatload of mint from my CSA).

I had spotted this on another blog and so I busted out the blender and gave it a shot. DELISH! And I'm pretty sure it's healthy because it contains a cucumber, right?!??

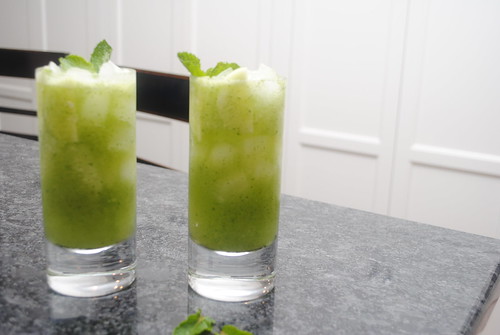
Mint cucumber gin fizz
025

This cocktail screams summer. I'll be making a pitcher for my next BBQ!

Ingredients
  • 4 oz. gin
  • 1 cup cucumber, cut into chunks, plus a few slices for garnish (seed the cucumber before measuring if it's very seedy)
  • 15 mint leaves, plus a few extra for garnish
  • 2 Tbsp. sugar (I used raw)
  • 1/4 cup fresh squeezed lemon juice
  • Chilled seltzer
  • Ice

Cooking Directions
  1. In the jar of a blender, combine the cucumber chunks, the mint leaves, sugar and lemon juice. Puree until you have a smooth mixture.
  2. Fill two glasses with ice. Add 2 ounces of gin to each glass and the thinly sliced cucumbers. Fill the glasses to 2/3rds full with the cucumber mixture. Top with seltzer and stir well. Garnish with fresh mint and cucumber slices.

Monday, May 30, 2016

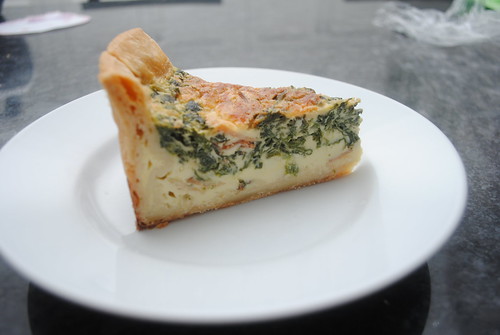
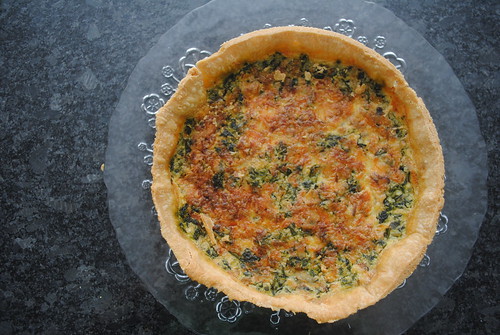
Spinach and bacon quiche

Week 2 of my CSA: Holy greens, Batman! This week's share is one ginormous box of greens: spinach, kale, Boston lettuce, parsley, cilantro, Swiss chard, collard greens, escarole... Challenge accepted!
054
Here's how I'm using these goodies:
  • Spinach: spinach and bacon quiche featured here
  • Escarole: salads for my lunch and also salad to top chicken cutlets Milanese
  • Collards: Braised with barbecue chicken
  • Kale: Portuguese Caldo Verde (chorizo, potato and kale soup)
  • Boston lettuce: Lettuce wraps with Vietnamese marinated pork tenderloin
  • Herbs: Thinking about a chimichurri with some grilled steak
  • Swiss chard: TBD (any ideas, people???)
This quiche is a bit harder than my typical recipe, but it's worth the effort. The dough needs to rest a bit before rolling and he recommends frothing the dairy/egg mixture. I didn't take out the blender but rather used my Kitchenaid with the whisk attachment.

Can't wait to see what next week brings now that the weather had finally turned sunny and warm. Let me know if you have ideas for the Swiss chard. Or the other greens - I'm sure there will be more to come!!


Spinach and bacon quiche
Adapted from Bouchon by Thomas Keller

058

Basic Quiche Shell Makes 1 nine-inch tart shell - Keller says to use a 9x2 inch ring mold. I don't have one so I used my springform pan and it worked fine.

Yield: 8 servings

Ingredients:
  • 2 cups flour (about 12 ounces), sifted, plus a little more for rolling

  • 1 teaspoon kosher salt

  • 8 ounces (2 sticks) chilled unsalted butter, cut into 1/4-inch pieces

  • 1/4 cup ice water 
  • 
2 tablespoons canola oil
Method:
  1. Place 1 cup of the flour and the salt in the bowl of a heavy-duty mixer fitted with the paddle attachment. Turn the mixer to low speed and add the butter a small handful at a time.
  2. When all the butter has been added, increase the speed to medium and mix until the butter is COMPLETELY blended with the flour. Reduce the speed, add the remaining flour and mix just to combine.  (Remember you don't want to see ANY flecks of butter in the dough, as they will melt when the shell is cooked and leave holes in the shell causing potential leaks when you fill it with custard.)
  3. Add the water a little at a time and mix until the dough gathers around the paddle and pulls cleanly away from the sides of the bowl. It should feel smooth, not sticky.  You may not need all the water, or you may need a little more.
  4. Remove the dough from the mixer and check to be certain that there are NO visible pieces of butter remaining; if necessary, return the dough to the mixer and mix briefly again. Pat the dough into a 7- to 8-inch disk and wrap in plastic. Refrigerate for at least 1 hour or up to a day. (If the dough does not rest, it will shrink as it bakes.)
  5. Lightly brush the inside of a 9-by-2-inch bottomless cake ring with canola oil and place it on a parchment lined jelly roll pan. Place the dough on a floured work surface and rub on all sides with flour. Flatten it into a larger circle using a rolling pin or the heel of your hand. Roll the rolling pin back and forth across the dough a few times, then turn it 90 degrees and roll again. Continue to turn and roll until the dough is one-fourth inch thick (yes, this is a fairly thick crust) and about 14 inches in diameter. (If the kitchen is hot and the dough has become very soft, move it to a baking sheet and refrigerate for a few minutes.)
  6. To lift the dough into the tart pan, place the rolling pin across the dough about one-quarter of the way up from the bottom edge, fold the bottom edge of the dough up and over the pin, and roll the dough up on the rolling pin. Lift the dough on the pin and hold it over the pan, centering it. Carefully lower the dough into the pan, pressing it gently against the sides and into the bottom. Trim any dough that extends more than an inch over the sides of the pan and reserve the scraps. Fold the excess dough over against the outside of the ring. (Preparing the quiche shell this way will prevent it from shrinking down the sides as it bakes. The excess dough will be removed after the quiche is baked.) Carefully check for any cracks or holes in the dough, and patch with the reserved dough as necessary. Place in the refrigerator or freezer for at least 20 minutes to re-solidify the butter. Reserve the remaining dough scraps.
  7. Place a rack in the middle of the oven and heat the oven to 375°F. Line the quiche shell with a 15-inch round of parchment paper. Fill the shell with pie weights or dried beans, gently guiding the weights into the corners of the shell and filling the shell completely. Bake the shell until the edges of the dough are lightly browned but the bottom is still light in color, 35 to 45 minutes.
  8. Carefully remove the parchment and weights. Check the dough for any new cracks or holes and patch with thin pieces of the reserved dough if necessary. Return the shell to the oven until the bottom is a rich golden brown, 15 to 20 minutes. Remove from the oven and allow the shell to cool completely on the jellyroll pan. Once again, check the dough for any cracks or holes, and patch if necessary before filling with the quiche batter.

Filling 

Ingredients:
  • 2 tablespoons unsalted butter
  • 1/4 cup minced shallots
  • 1 pound spinach, large stems removed, thoroughly washed
  • 2 teaspoons kosher salt
  • 1 teaspoon freshly ground black pepper
  • 3/4 cup grated comte, emmentaler, or gruyere cheese
  • 6 slices bacon, cooked and coarsely chopped
Method:Melt the butter in a large skillet over medium heat, add the shallots and cook for 2 minutes, add the spinach, salt and pepper and cook for two minutes more, until the spinach has wilted.  Remove spinach from pan and drain on paper towels, reserve until ready to build and bake your quiche.


Basic Quiche CustardMakes enough for 1 nine-inch quiche that serves 8 -10
Ingredients:

  • 2 cups whole milk

  • 2 cups heavy cream

  • 6 large eggs
  • 
1 tablespoon kosher salt

  • 1/4 teaspoon freshly ground white pepper

  • 6 gratings fresh nutmeg
Method:
  1. Combine the milk and cream in a large saucepan and heat over medium heat until scalded (meaning a skin begins to form on the surface). Remove from heat and set aside to cool slightly, 10 to 15 minutes.
  2. Put 3 eggs, half the milk and cream mixture, 1 1/2 teaspoons salt, 1/8 teaspoon pepper and 3 gratings of nutmeg in a blender and blend on low speed about 5 seconds to mix thoroughly, then increase the speed to high and blend until the batter is light and foamy, about 30 seconds.
  3. This is the first layer of custard for the quiche. Once you have assembled the first layer of the quiche, add the remaining custard ingredients to the blender and repeat the process to complete the quiche.


Assembly and Baking:

  1. Scatter 1/4 cup of cheese, 1/2 of the bacon,  and 1/2 of the spinach mixture evenly into baked quiche shell still on baking sheet.
  2. Blend the quiche batter again to aerate it, then pour in enough of the batter to cover the ingredients and fill the quiche shell approximately halfway.
  3. Top the custard with the remaining bacon, filling and another 1/4 cup of cheese.
  4. Blend the second half of the custard and fill the quiche shell all the way to the top, sprinkle with remaining 1/4 cup of cheese (if you don't have a very steady hand, you might spill some of the custard on the way to the oven; fill the shell most of the way, then pour the final amount of custard on top once the quiche is on the oven rack). You may have some custard left over.
  5. Bake for 1 1/2 to 1 3/4 hours, until the top of the quiche is browned and the custard is set when the pan is jiggled. Remove the quiche from the oven and let cool completely on a rack, then wrap and refrigerate until chilled, at least 1 day, or up to 3 days.
  6. Once the quiche is thoroughly chilled, using a sharp knife, cut away the excess crust from the top edge.  Gently remove the outside ring, working it free in spots with a small knife if necessary. Return to the refrigerator until ready to serve.
  7. To serve, heat the oven to 375°F. Line a baking sheet with lightly oiled parchment paper. Using a long serrated knife, and supporting the sides of the crust with your opposite hand, carefully cut through the edge of the crust in a sawing motion. Switch to a long slicing knife and cut through the custard and bottom crust. Repeat, cutting the quiche into 8 to 10 pieces. Place the pieces on the baking sheet and reheat for 15 minutes or until hot throughout. 

Serves 8-10


Friday, May 20, 2016

CSA week 1: Spring veg!

011
Ask my husband if I'm excited about my new CSA share and he will probably roll his eyes. I might talk about it a little too often. Fine, I'm a nerd. But he will have to admit he likes the yummy stuff he gets. I signed up with a local farm in Cranford, NJ. Dreyer Farms is about 15 minutes from where I live so I decided to give it a shot. I got an email about the contents of my first box last weekend: pastured eggs, asparagus, broccoli rabe, shiitakes, local goat cheese, pizza dough, scallions, beets. YUM! So many possibilities.

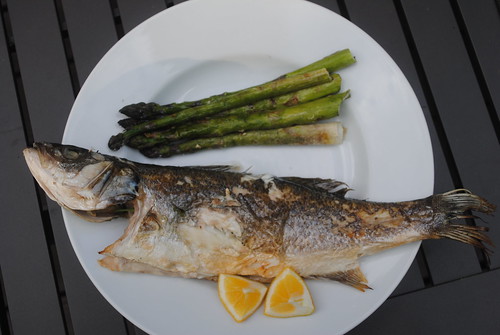
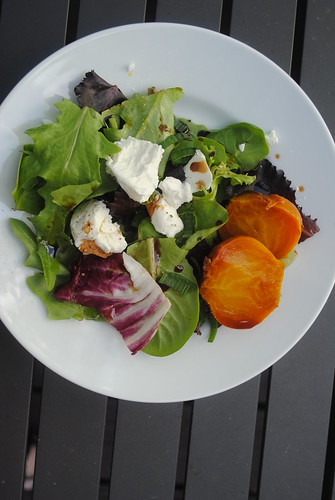
I've made the eggs for breakfast a couple times this week. I sliced and sauteed a couple of the shiitakes added a bit of chopped scallion greens and then added the egg. These eggs are seriously good - from a farm in Princeton NJ. For dinner last night, I made grilled whole branzino and grilled the asparagus with a drizzle of olive oil and some garlic and sea salt. To go with it, I made this roasted beet salad with some of the local goat cheese. The beets are gorgeous and super sweet and the goat cheese is some of the creamiest I've ever tried. (This dinner took about 10 minutes to prep - roast the beets the night before.) 019
I can't wait for the next 26 weeks of delightful fruits, veggies and treats. No doubt the choices will make many appearances in my post. Tonight we're using the pizza dough and broccoli rabe on a grilled white pizza. If it's a hit, I'll share next week. Til then, enjoy the weekend!

(And for the locals, I think Dreyer Farms still has openings in their CSA if you're interested - Check it out at the link above.)

Roasted beet and goat cheese salad

018

Ingredients
  • 2 medium beets, scrubbed
  • 2 cups mixed greens
  • 2 oz. fresh goat cheese
  • 1 scallion, green part only, thinly sliced
  • 3 tsp. Extra Virgin olive oil, divided
  • 1 tsp. balsamic vinegar or lemon juice
  • salt and pepper, to taste

Cooking Directions
  1. To roast the beets, preheat oven to 400F. Place each beet on a square of aluminum foil and drizzle each with 1 tsp. olive oil and a sprinkle of salt. Wrap in foil. Roast for 30 minutes, then test for doneness with a sharp knife. The knife should slide in easily. If still hard, roast for a few more minutes until done.
  2. Allow the beets to cool then use your hands to rub off the outer skin. At this point you can refrigerate and store the beets for a day or so.
  3. When ready to serve, divide the salad greens among two plates. Sprinkle the scallions over and the top with the goat cheese. Halve the beets and add them to the plate. Drizzle with remaining olive oil and a little balsamic or lemon juice (I used Mission fig balsamic). Add salt and pepper to taste.

Tuesday, May 17, 2016

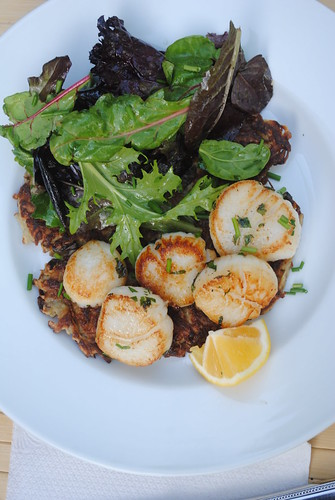
Caramelized scallops with smoked chili cream, mixed greens and potato scallion pancakes

247

I love technology. I have to, right? I run a cloud computing offering, so I can't really hate technology. Except when it doesn't work. Like the last two weeks. I have an Eye-fi card for my camera. Super cool concept - it automatically transfers photos to my device of choice without any cables. Except when it doesn't. All of a sudden, it wouldn't transfer any of my photos to my laptop. And a blog without photos is, well, dull. So you had to wait.

But now I've got a new SD card reader (my laptop doesn't have one built-in). So no more excuses and no more delays...

We've had a couple good food weeks whilst my camera misbehaved. Ramps, fiddlehead ferns... and scallops! My husband emailed me from work one day, subject line "scallops". That got my attention. Turns out a guy he works with scallops and was selling 5 pound bags. Sign me up! 

They were delivered to my husband last Wednesday at work. Scallops are not a typical Wednesday night dinner in my house, but I had to cook some of them while fresh. The rest would get packed into the freezer (and a bag to dad of course). So I went with a simple caramelized scallop with an easy smoked chili cream. It's from the Black Dog Cookbook which suggested serving with potato pancakes. Super easy... and a hit.

253

Caramelized scallops with smoked chili cream, mixed greens and potato scallion pancakes
Adapted from Black Dog Summer on the Vineyard

Ingredients
    Smoked chili cream
  • 1 tsp. chipotle chili powder
  • Juice of one lime
  • 1/3 cup sour cream
  • Salt, to taste

  • Scallion-potato pancakes
  • 3/4 pounds red potatoes, scrubbed
  • 3 scallions (green onions), cut into 1/4-inch slices
  • 1/4 cup all-purpose flour
  • 1 egg, slightly beaten
  • 1/2 tsp. salt
  • 1/4 tsp. white pepper
  • 2 Tbsp. olive oil

  • Scallops
  • 10-12 sea scallops, thawed if frozen
  • 1 Tbsp. fresh parsley, chopped
  • 2 Tbsp. Extra Virgin olive oil
  • 3 cups mixed baby greens
  • 1 Tbsp. chopped chives
  • lemon wedges

Cooking Directions
  1. To make the smoked chili cream, combine the lime juice and chipotle powder in a small bowl and let sit for about 10 minutes. Whisk in the sour cream and salt to taste. Refrigerate until ready to use.
  2. To make the potato pancakes, grate unpeeled potatoes and squeeze out excess liquid (drier is better). Mix in the scallions, egg, flour, salt and pepper.
  3. Heat 1 Tbsp. of the oil in an 8-inch non-stick skillet until hot. Add half the potato mixture and lower the heat. Cook until golden brown, about 5 minutes. Flip and cook the other side until golden brown and potatoes are cooked through, another 5 minutes or so. Remove from pan and keep warm. Repeat with remaining potato mixture.
  4. While potatoes are cooking, dry the scallops on a paper towel then sprinkle with salt, pepper and parsley. Heat 2 Tbsp. oil in a non-stick pan over high heat until just smoking. Reduce heat to medium high and add the scallops. Let them cook for about 2 minutes undisturbed, then turn them over and cook another minute.
  5. Meanwhile, toss the greens with a little olive oil and a squeeze of lemon juice.
  6. To serve, place a potato pancake on each plate and top with half the scallops. Put half the greens on the side and sprinkle with the chopped chives. Serve with a drizzle of the smoked chili cream and lemon wedges.

Wednesday, April 27, 2016

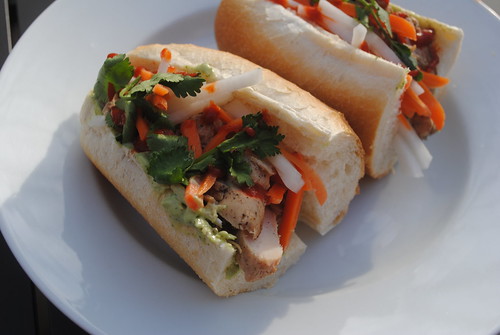
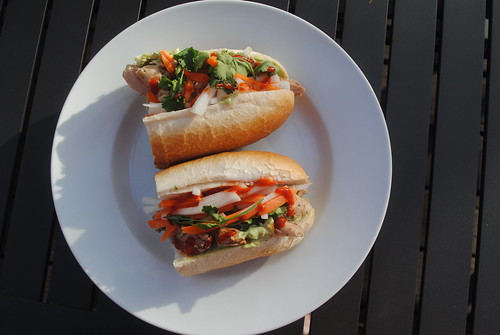
Grilled chicken banh mi

banh-mi (2)
A couple of weeks ago, I had a business trip to London. Got home to what at first looked like a normal weekend. But Saturday after dinner, my little Nutmeg had some symptoms that triggered a call to the doctor. The nurse on duty sent us to the ER - more because their office was closed than a true emergency, but ER all the same.

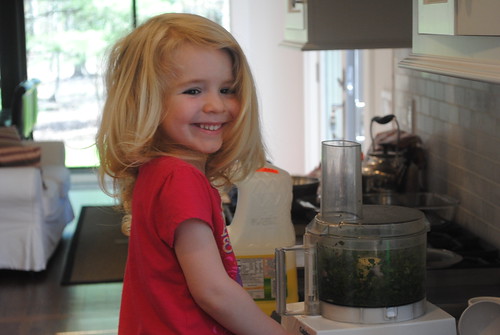
Turned out to be strep with a couple odd symptoms, but my tiny girl was not released til the wee hours, and only after a couple of not-so-pleasant tests. She slept in Sunday but was still tired so I kept her home on Monday. And that's how she became my sous chef. Meet Chef Nutmeg. Pretty cute, huh?

sous-chef
I love cooking with my girls. Yes, it will be messier. Yes, it will take longer. But they love to help and are usually willing to taste whatever they've made. And I get to have my two favorite little people join me in doing the thing I love best.

Our menu: Grilled chicken banh mi with cilantro maggi aioli. The chicken is super easy. The aioli takes a bit of time, so if you're in a rush, use plain mayo or make some sriracha mayo. Both are great on banh mi. Make the pickles a day or two ahead and this is an easy weeknight meal.

You can have the recipe, but I'm keeping my sous chef.

Grilled chicken banh mi
Adapted from The Banh Mi Handbook by Andrea Nguyen

banh-mi (1)

Ingredients
    For the pickled carrot & daikon
  • 1 medium daikon
  • 1 large carrot
  • 1 tsp. salt
  • 2 tsp. plus 1/2 cup sugar
  • 1 1/4 cups distilled white vinegar
  • 1 cup lukewarm water

  • For the aioli
  • A handful of cilantro sprigs
  • 1/2 small shallot
  • 1 egg yolk
  • 1 Tbsp. fresh lemon juice
  • 1 Tbsp. Maggi seasoning sauce
  • 1 cup canola oil

  • For the sandwiches
  • 1 1/2 pounds boneless, skinless chicken thighs
  • 1/4 tsp. sugar
  • 1/4 tsp. salt
  • 1 1/4 tsp. black pepper
  • 1 Tbsp. fish sauce
  • 1 Tbsp. fresh lime juice
  • 1 1/2 Tbsp. canola oil
  • 6 baguette buns, each 6-8 inches long
  • Thinly sliced cucumbers
  • Cilantro sprigs
  • Sriracha

Cooking Directions
  1. To make the pickle, peel and cut the daikon and carrot into sticks about 3 inches long and 1/4 inch thick. Put in a bowl and toss with the salt and 2 tsp. sugar. Massage the salt and sugar into the vegetables for about 3 minutes or until you can bend a piece of daikon and the tips touch without breaking. Flush with running water and drain. Transfer to a quart jar.
  2. For the brine, stir together the 1/2 cup sugar with the vinegar and water until dissolved. Pour into the jar to cover. Discard any extra brine that won't fit in the jar. Refrigerate for one hour and store up to one month.
  3. To make the aioli, pulse the cilantro and shallot in a food processor until minced. Add the egg yolk, Maggi, and lemon juice. Run the food processor for about a minute until you have a creamy mixture.
  4. With the machine running, pour in the oil in a thin steady stream (the stream should be about as thick as a strand of angel hair pasta. The mixture will emulsify and have the consistency of mayonnaise. Store refrigerated in a airtight container for up to a week. Tastes best if it sits for at least an hour.
  5. Trim any visible fat off the chicken thighs. In a bowl, stir together the sugar, salt, pepper, fish sauce, and lime juice. Add the oil and chicken and cover and let marinate for 30 minutes or more.
  6. Preheat a grill over high heat, then grill the chicken thighs until cooked through and the juices run clear, about 10 minutes.
  7. To make the banh mi, spread some of the aioli on the bread. When slightly cooled, slice the chicken across the grain. Pile some chicken into each bun, along with a few cucmber slices. Top with some of the pickle, a few cilantro sprigs and a few drops of sriracha.

Friday, April 22, 2016

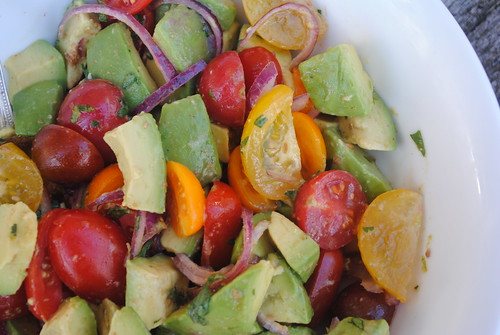
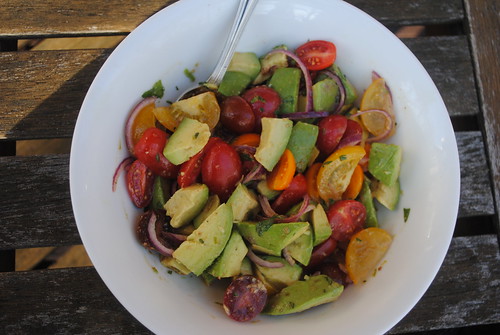
Avocado salad

avocado salad (1)
"The salad is delicious." Words rarely (ok never) uttered by my husband. We're talking a bunch of raw veggies with some acid and a little oil. Not what he typically gets excited about. I get more compliments on dead creatures, things with bacon, etc. Not salad.

But this salad made history by earning his praise!

It came about because I needed a side to go with Indian grilled chicken legs and some Basmati rice. So I turned to my good friend eatyourbooks.com (shameless plug for the site coming). In seconds, I can search my entire collection of cookbooks for a specific course and ethnicity. I entered Indian and salad and voila! I was presented with a list of about a dozen recipes from my cookbooks. I scanned them and this one won out because I had all the ingredients on hand and it sounded fabulous.

Although the book labels it Indian, the flavors could also go with Mexican or any Latin dish - it uses lime, cumin, and cilantro, all common flavors in those cuisines. Can't wait to make it again when tomatoes are in season and fresh from the farm.

avocado salad (2)


Avocado salad
Adapted from One Spice, Two Spice by Floyd Cardoz

Fresh, bright flavors come together in this amazing salad. Make it a couple hours ahead then toss in the avocado at the end.

Ingredients

  • 1/2 teaspoon cumin seeds
  • 1 pint grape and/or cherry tomatoes (preferably a mix of different colors), halved
  • 1/4 red onion, thinly sliced
  • 1/4 cup cilantro leaves, torn
  • juice of 1/2 a lime, or more to taste
  • Pinch cayenne pepper
  • Kosher salt, to taste
  • 2 whole Hass avocados, ripe, but not too soft

Cooking Directions
  1. Toast the cumin seeds in a small pan until fragrant. Cool slightly then grind with a mortar and pestle.
  2. In a bowl, combine the tomatoes, onion and cilantro. Sprinkle the lime juice over and then fold in the cumin and cayenne. Season to taste with salt. NOTE: Recipe can be made up to this point a couple hours ahead. Cover and refrigerate.
  3. Just before serving, halve the avocados, then carefully scoop out each half and cut into chunks. Gently fold it into the tomato mixture. Add more lime juice or salt if needed.

Tuesday, April 12, 2016

Spiced apple sangria

Well hello sangria weather. It's nice to see you.

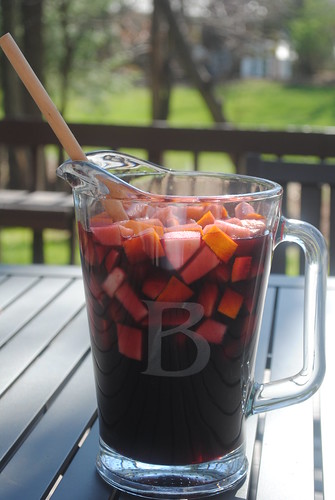
red wine sangria (2)

Many years ago, a friend of mine made a batch of sangria. I guess you could say my tastes were not as evolved as they are now because my reaction was, "What is this? Red wine and sprite?" I've come a long way since then (and my friend and I still joke about it.) When the temperature rises, this is one of the first things I make. I love a glass on the deck while the kids play outside and hubby grills something delish. Close my eyes and I'm back in Spain. Doesn't get much better.

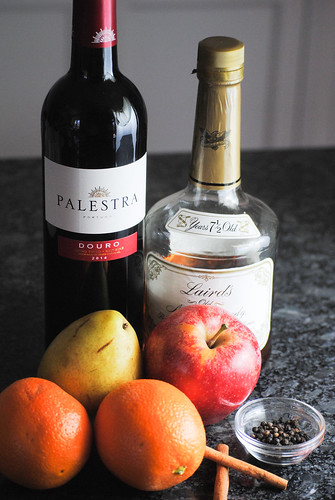
This makes enough simple syrup for a few batches. Think party. Or another batch next weekend. I keep the extra syrup in a jar in the fridge. I use good (not great) wine. This particular one is my fave these days. It's drinkable on its own, but not so expensive that you don't want to make it better with some fruit, brandy and spiced apple simple syrup. And I also like to use Laird's apple brandy, but another apple brandy would do.

Forecast says 70's this weekend. Anybody want to come over for a glass???

red wine sangria (1)

Spiced apple sangria
Adapted from The Latin Road Home by Jose Garces

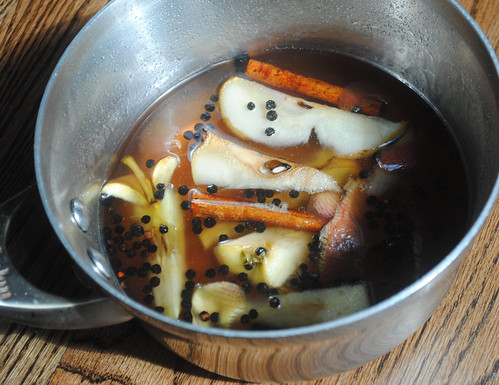
red wine sangria (3)

Ingredients
  • 1 apple
  • 1 cup sugar
  • 1 cup water
  • 2 cinnamon sticks
  • 1 Tbsp. black peppercorns
  • 1 pear, cored and diced
  • 1 orange, diced, skin and all (discard seeds)
  • 1 bottle red wine, preferably Spanish or Portuguese
  • 1/4 cup apple brandy
  • Juice of half a lemon

Cooking Directions
  1. Peel and core the apple, reserving the peels and core.
  2. Place peels and core into a small pan with the sugar, water, cinnamon sticks and peppercorns. Bring to a boil, then reduce heat and simmer 15 minutes. Allow to cool, then strain, discarding solids.
  3. Meanwhile, dice the rest of the apple and combine in a pitcher with the pear, orange, red wine, and lemon juice.
  4. Add 1/3 cup of the apple syrup to the red wine mixture and mix well with a wooden spoon. Cover and chill. Serve over ice.
Related Posts Plugin for WordPress, Blogger...