Showing posts with label recipe. Show all posts

Thursday, March 3, 2016

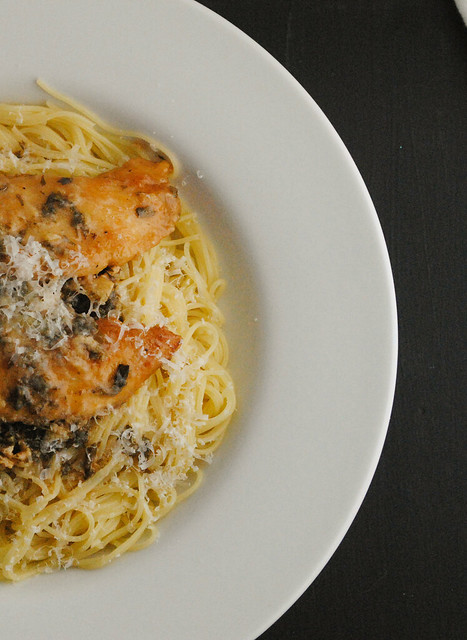
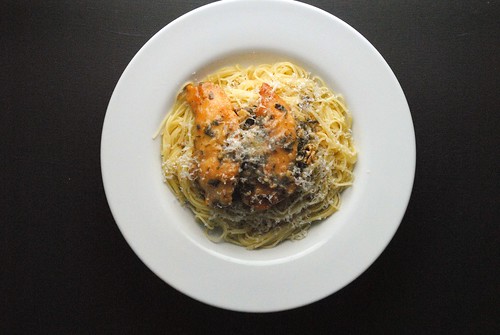
Angel hair pasta with chicken, white wine and garlic

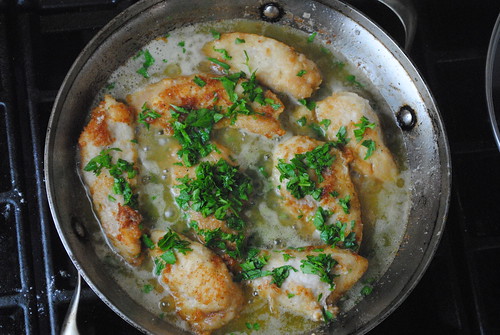
chicken-garlic-wine4
I'm a cookbook junkie. Big surprise from a food blogger. (We can and will psychoanalyze my addiction in a future post.) But mid-week, I don't always have time to consult my "friends" (aka Mario, Ina, Laurent, Thomas, etc.) So this is one of my go-to dinners. Few reasons:
  1. I almost always have all the ingredients on-hand - garlic, white wine, chicken, parsley, pasta
  2. I can make it in about 25 minutes. 
  3. I can make it any time of day and heat it for dinner. So if I'm working from home, I can throw it together at lunchtime. If I'm in the office, I can whip it up when I get home.
  4. Everyone claps when it hits the table. Yes, the kiddies actually cheer for this one.
Number 4 is my favorite. And if I make a little extra, lunch for the next day is done for the kids too!

So working moms, make this one tonight. No joke. My husband loves it. My kids love it. Makes for a happy night. (and if you use regular wine instead of cooking wine, BONUS! a glass for mommy!)
chicken-garlic-wine3

Angel hair pasta with chicken, white wine and garlic

I think this originated with a recipe my mom clipped from a newspaper when I was a kid (in other words, longer ago than I'd care to admit). I first made it in college. I no longer even look at a recipe to make it. In other words, it's easy!
chicken-garlic-wine5
Ingredients
  • 2 boneless skinless chicken breasts
  • 1/2 cup all-purpose flour
  • Kosher salt and freshly ground black pepper
  • 1/2 cup Extra-virgin olive oil
  • 1 Tbsp. butter
  • 3 cloves garlic, minced
  • 1 cup white wine (I use Pinot Grigio, but you can use cooking wine or whatever you have on hand)
  • 1 small bunch fresh parsley leaves, chopped
  • 3/4 lb. Angel hair pasta, or pasta of your preference
  • Freshly grated Parmigiano-Reggiano cheese
  • chicken-garlic-wine
Cooking Directions
  1. Cut each chicken breast into 4 thin pieces (you can skip this step, but I find it improves the taste and makes the chicken more tender).
  2. On a small plate, mix together flour with salt and pepper to taste.
  3. If you are going to serve the dish immediately, start bringing a large pot of water to a boil for your pasta. If you're making the chicken ahead, wait and cook the pasta just before serving.
  4. In a saute pan with a lid, heat the olive oil and butter over medium heat.
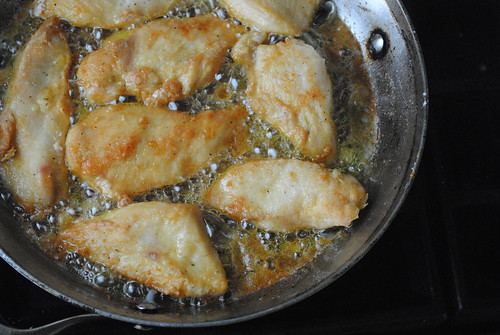
  5. When the oil is hot, dredge the chicken pieces in the flour mixture. I don't worry about shaking off the excess - it thickens the sauce and adds more flavor. Place them in the pan and cook until golden brown. Turn them over and brown the other side. Transfer chicken to a plate.
  6. Reduce heat to medium-low and add the garlic, being careful not to brown it. Let it cook for about 30 seconds, then pour in the wine. Bring to a simmer and let it cook for 5 minutes.
  7. Return the chicken to the pan along with any juices that have accumulated. Season to taste with more salt, if needed. Sprinkle the parsley over the top and cover.
  8. Simmer on low heat for 20 minutes, flipping the chicken halfway through. During the last 5-10 minutes cook your pasta and drain.
  9. To serve, put pasta in bowls and top with chicken and plenty of the sauce. Finish with a generous sprinkle of Parmigiano-Reggiano.

Wednesday, February 24, 2016

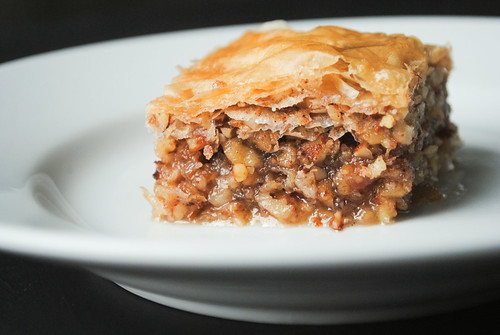
Baklava

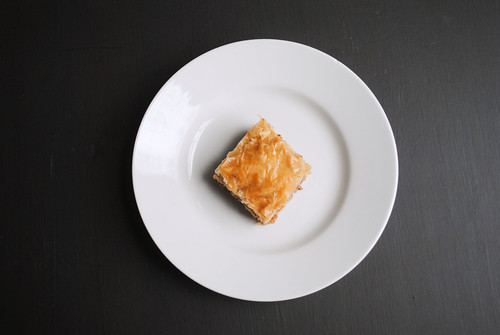
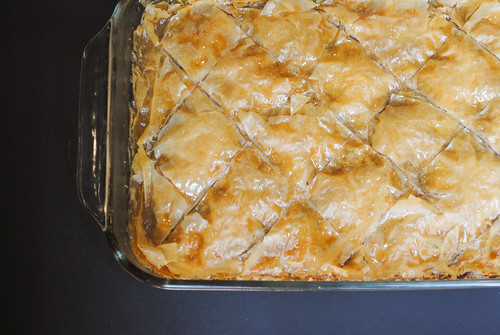
baklava_25132214851_o
Broccoli. It's one of my New Year's resolutions. Not for me. For my kids. Have I said enough? My goal is to get them to eat it. Willingly. Without tears. Or screaming.

Two months in and how am I doing? 50-50. The 3-year old Bubbalicious will eat it. But she will try anything. And then there's the 5-year old. Who needs the Boogeyman? Put a piece of broccoli in front of her and (cue scary music) fear and dread appear on her otherwise sweet face. But 10 months left to go.

It's not so much about the broccoli as it is about my goal of putting one meal on the table and having everyone eat it.(Did I mention without tears???) We're getting there. The girls like Indian, Moroccan, and so on - things many kids their age wouldn't touch.

But last night was one for the record books. I made kielbasa and pierogies (like any good Polish girl should). We've had it about a zillion times since the 5-year old began eating solid foods. But last night she didn't like it. Apparently her taste buds have changed, or so she says.

Only a delicious dessert could save the day. And let's be clear. That dessert was for me. Baklava. Sweet, nutty, yum. It made everything better.

Hopefully tonight goes better... If not, there's more baklava.


baklava_25225416895_o

Baklava
Adapted from Vefa's Kitchen by Vefa Alexiadou

Looks hard, right? It's actually really easy if you have the patience for all the layers. Great dessert for a crowd and fun to make with the kids who like to paint the butter on the sheets of phyllo. Here's my cheat - the recipe calls for clarified butter. Rather than going thru the process of clarifying it, use Ghee which can be found in Indian markets or the Indian section of many grocery stores.

baklava_25107154252_o
Ingredients
  • 1 1/2 cups clarified butter, melted (or use Ghee)
  • 1/2 lb. ready-made phyllo dough
  • 2 cups walnuts, chopped
  • 2 cups almonds, chopped
  • 2 tsp. ground cinnamon
  • 2 tsp. ground cloves

  • For the syrup
  • 3 cups sugar
  • 1/2 cup honey
  • 1 tsp. vanilla

Cooking Directions
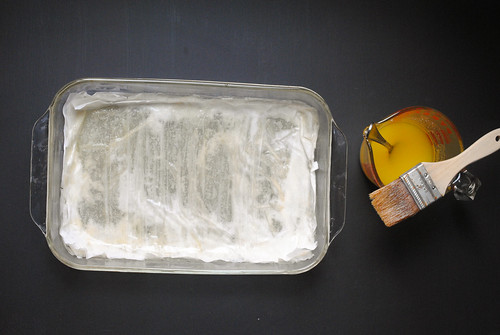
  1. Brush a baking pan the same size as the sheets of phyllo with melted butter (I used a 9x12). Alternatively, cut the sheets of phyllo to fit your baking pan and brush it with melted butter.
  2. Combine the nuts, cinnamon, and cloves in a bowl.
  3. Preheat the oven to 350°F.
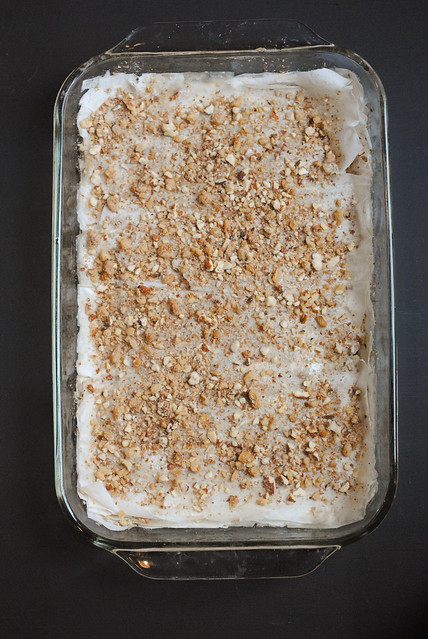
  4. Lay 4 sheets of phyllo on the base of the prepared baking pan, brushing each with melted butter. Sprinkle some of the nut mixture evenly over them.

  5. baklava_25199131876_o
  6. Continue layering the sheets of phyllo, 1 at a time and brushing each with melted butter, and sprinkling with some of the nut mixture until all of it has been used and only 4 sheets of phyllo remain. (If it has been necessary to trim the phyllo, brush the trimmings with melted butter and place between the layers.) Top with the remaining sheets of phyllo, brushing each one with melted butter.
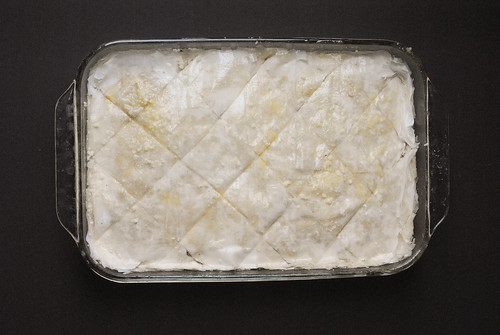
  7. Score the top layers with a sharp Knife into small diamond-shaped or triangular pieces. Brush with the remaining melted butter and sprinkle lightly with warm water to prevent the phyllo from curling. Bake for 30-40 minutes, or until golden brown.

  8. baklava_24929812320_o
  9. Meanwhile, make the syrup. Put the sugar, honey, and vanilla, into pan, pour in 2 cups water, and bring to a boil, stirring constantly until the sugar has dissolved. Simmer, without stirring, for 5 minutes.
  10. Ladle most (I used about 3/4) of the hot syrup carefully and evenly over the baklava as soon as you take it out of the oven. Let it absorb the syrup and cool completely. Add more if needed.

  11. baklava_25225417555_o
  12. Baklava keeps, covered loosely with a cloth, at room temperature for 1-2 weeks.

Thursday, February 18, 2016

You have to start somewhere...

...so here we go.

Untitled

A friend recently posted an image on Facebook that read, "A year from now, you'll wish you started today." Or something like that. So I'll stop primping and preening my template, overthinking my approach and simply making excuses - and start. Today.

See, I used to have another food blog. It was fun, kept me busy, and was a great break from my life in the clouds (cloud computing that is, AKA my day job). Then I had two kids and that blog was neglected. But I missed it. I missed the community of otherwise strangers that it connected. I thought about picking that up again, but it was no longer part of me. So we begin again.

Join us. Maybe you'll find some new things to make, maybe you'll laugh as I recount stories of trying to get my kids to try new foods (or at least willingly ingest a single piece of the dreaded, tear-inducing broccoli), maybe you'll find a story to share.

But we can't get anywhere if we don't start somewhere.

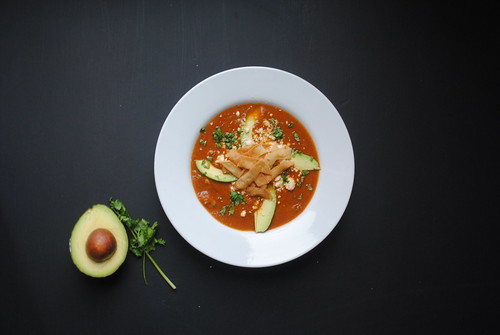
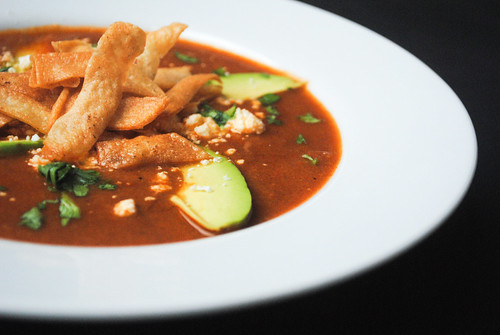
chicken-tortilla-soup

Chicken tortilla soup
Adapted from The Latin Road Home by Jose Garces

This hearty chicken tortilla soup makes a great lunch or light supper. The recipe makes enough for 2 meals for my husband and me, with some leftover.

Ingredients
    Pasilla chile paste
  • 6 dried Pasilla chiles
  • Boiling water

  • Crispy tortilla strips and chips
  • 1 1/2 qts. vegetable oil, for frying
  • 14 small (about 6-inch) corn tortillas
  • Kosher salt

  • Poached chicken
  • 1 Spanish onion, coarsely chopped
  • 1 bay leaf
  • Kosher salt
  • 1 1/2 lb. boneless, skinless chicken thighs

  • Soup
  • 2 Tbsp. vegetable oil
  • 2 Tbsp. (4 to 6 cloves) Roasted garlic
  • 1 Spanish onion
  • 3 Beefsteak tomatoes
  • 1/4 cup tomato paste
  • 1/4 cup Pasilla chile paste (see below for recipe)
  • 1 canned chipotle chile in adobo, with suace
  • 2 qts. chicken stock
  • Kosher salt

  • To serve
  • 1/4 cup sour cream
  • 1/4 lb. crumbled queso fresco (1/2 cup)
  • 2 Avocados, diced
  • 2 Tbsp. chopped cilantro

Cooking Directions
  1. To make the chile paste, pour boiling water over the dried chilies and soak for 10 minutes. Place chilies and a little of the liquid into a blender and puree, adding just enough liquid to make a paste. (Or use an immersion blender with just a bit of the liquid). Press the paste thru a strainer and use as indicated below. (I freeze any extra for my next batch.)
  2. Char the vegetables. Place the tomatoes and onions on a baking sheet and place under a broiler, turning occasionally until charred on all sides. When cool enough to handle, coarsely chop the onion and core and chop the tomatoes.
  3. To make the tortilla strips and chips, heat the oil to 375°F in a stockpot, using a candy or deep-fry thermometer to monitor the temperature. Line a baking sheet with paper towels. Use a sharp knife or a pizza cutter to slice 6 of the tortillas into strips about 1/4- inch wide. Fry the strips briefly, 30 to 60 seconds, just to crisp them. Use a slotted spoon to carefully transfer the strips from the oil to the baking sheet to drain. Sprinkle with salt while warm, if desired. Cut remaining 8 tortillas into quarters and fry in the same manner. Drain.
  4. To poach the chicken, bring a large saucepan of water to a boil. Add the onion, bay leaf, and 3 to 4 tablespoons salt. Add the chicken and simmer for 10 to 12 minutes, until just cooked through. Lift the chicken out of the water, drain it, and allow it to cool. Shred it by hand into bite-size pieces. (Discard the cooking water.)
  5. To make the soup, heat the oil in a stockpot over medium-high heat. Add the garlic, onion, and tomatoes and cook until softened, about 10 minutes, stirring occasionally. Stir in the tomato paste, chile paste, and chipotle chile with sauce and cook for 10 minutes more. Add the stock and bring to a boil. Lower the heat and simmer, uncovered, for 30 minutes.
  6. Stir the tortilla chips into the soup and cook for another 5 minutes. Take the pot off the heat and use a handheld immersion blender to purée the soup until it is very smooth. Strain through a fine-mesh sieve and season to taste with salt. (At this point, the soup can be cooled and stored in the refrigerator in an airtight container for up to 3 days.)
  7. To serve, rewarm the soup over medium heat, stirring often. Garnish each serving with sour cream, cheese, avocado, shredded chicken, cilantro, and tortilla strips.


Related Posts Plugin for WordPress, Blogger...